All of my patterns come with a cross stitch guide/instructions to match all levels of stitchers. This page offers a full visual guide with expandable images and embedded videos. Enjoy ♥
Fabric Preparation & Sizing
Edge Finishing
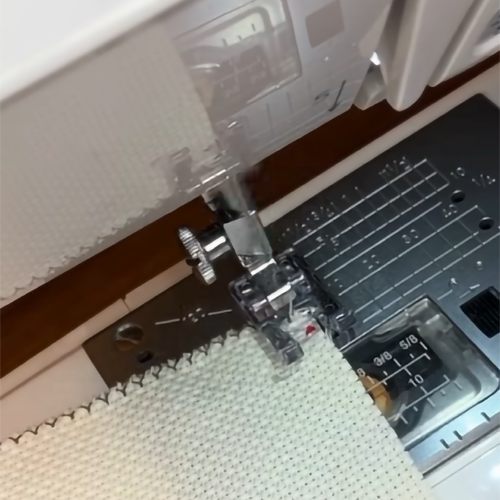
Cross stitch fabric is notorious for unraveling while you work. The best way to prevent fraying is to run a quick zigzag stitch around the raw edges using a sewing machine. If you don’t have a machine handy (or simply can’t be bothered), taping the edges with masking tape or painter’s tape works just fine. You can also sew the edges by hand with a blanket stitch.
Finding the Center
On your pattern chart, locate the bold arrows along the top and left borders. Following these inward leads straight to the exact center point. To find the center of your fabric, fold it in half horizontally, then fold it in half vertically. Give the corner point a firm pinch or crease; when you unfold it, the center of your fabric is right at that intersection.
Margin Allowance
Never cut or buy fabric sized to the exact dimensions of the design. Always allow at least 2–3 inches of extra fabric on all four sides to give you enough breathing room for framing or hoop finishing. Check out our Cross Stitch Calculator for measurement suggestions.
Starting & Securing Thread
If you prefer to see the techniques in action, watch my Basic Cross Stitch Tutorial on YouTube (also shown above) which covers the loop start method, burying tails, and stitch direction.
Separating Floss and Strands
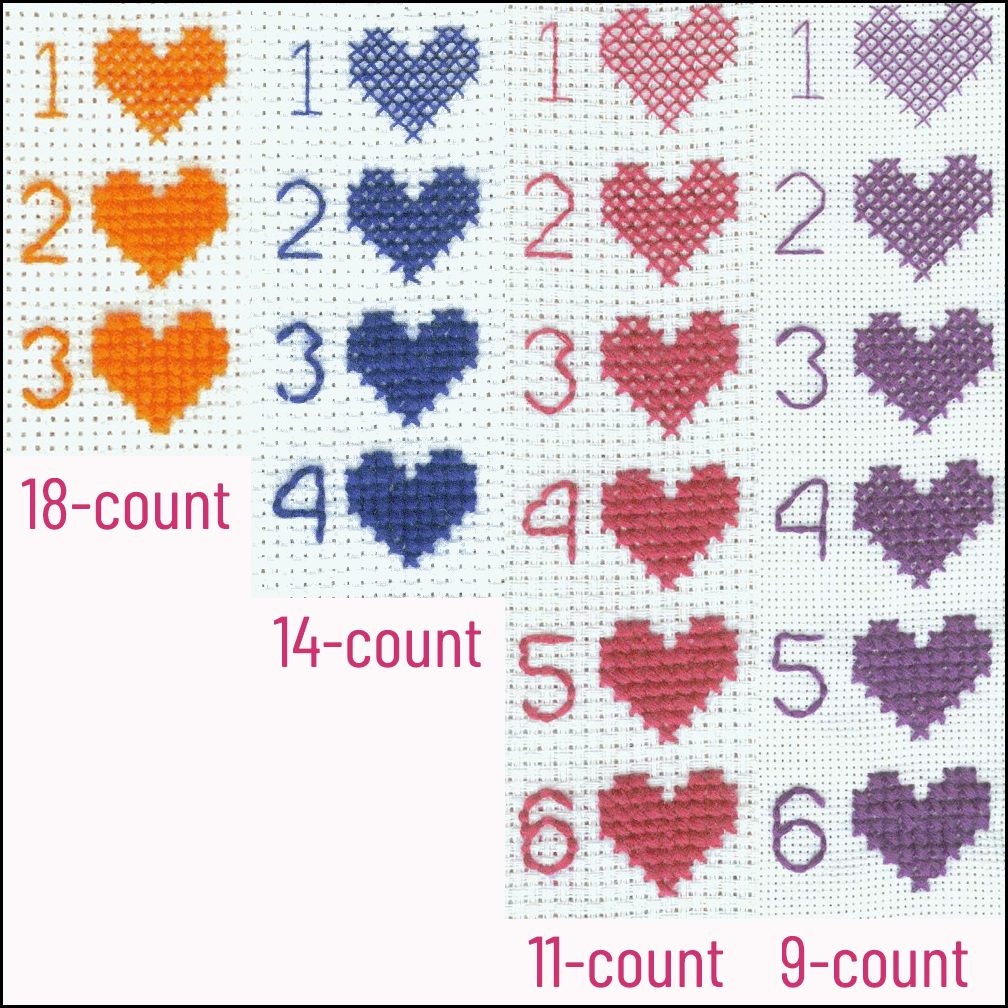
Standard embroidery floss comes with 6 individual strands. Cut a length you are comfortable handling (an arm’s length or a double arm’s length) and separate only the strands you need. For 14-count fabric, 2 to 3 strands provide solid coverage; for 16-count or 18-count, 2 strands are standard. Refer to the included strand-count graphic to choose your preferred level of fullness.
The Loop Start Method
The Loop Start method allows you to secure your thread without any knots on the back. If you are framing your work, knots can sometimes cause issues pushing through the back.
Once you have your floss cut, thread your needle to the middle point of your floss. Fold the floss in half to make this easier to find. On your fabric, start from the bottom and come up through one of the holes. Go back down and across to create your first half stitch. Secure your tail on the back and pull the floss all the way through until there is only a 1–2-inch tail. Come back up from the bottom to start the next part of your stitch, but do not pull all the way through. Flip your work over and place the tail through the loop on the back. Once it is secure, pull the remaining floss taut, capturing the tail in the loop.
Burying Tails
To finish off a thread cleanly without knots, bring the needle to the back of the work and slide it under 3–4 existing stitches. Snip the remaining thread close to the fabric.
Reading the Chart & Symbols
Key/Legend Navigation
Charts are provided in color with overlaid symbols or in high-contrast black and white. Each symbol corresponds to a specific DMC floss code on the legend page, with cross-references for Anchor, J&P Coats, and Sullivan where available.

In the color version, you will see a color block with a symbol over it. This is also how the pattern looks. To the right, you will see the corresponding DMC number as well as Anchor, J&P Coats, and Sullivan numbers when available. The name of the color is at the end.

Similarly, the black and white pattern has floss numbers and color names, but only black symbols on white boxes. The pattern looks the same. Some stitchers prefer this type of chart or like to save on printer ink when printing it out. It also makes a great companion to the color pattern if you want to use a highlight to mark which stitches you have completed.
Grid Lines
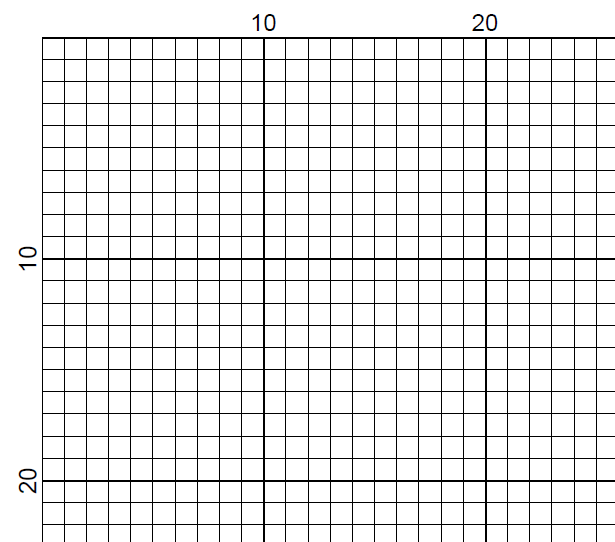
The bold grid lines on the chart represent 10×10 stitch blocks for easier counting.
Stitch Direction
To keep your finish looking crisp and uniform, make sure all your bottom half-stitches slant in the same direction, and all top half-stitches slant the other way (e.g., all bottom / followed by top \).
Use the included images as an example.
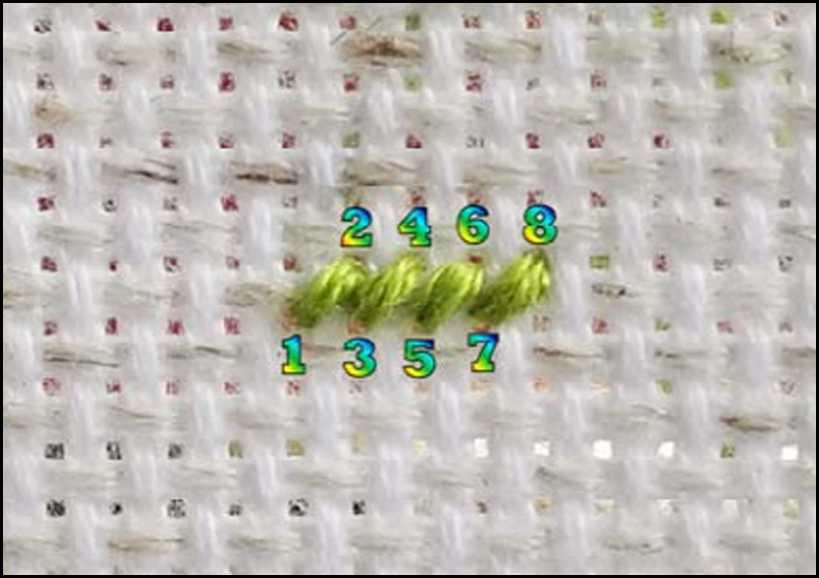
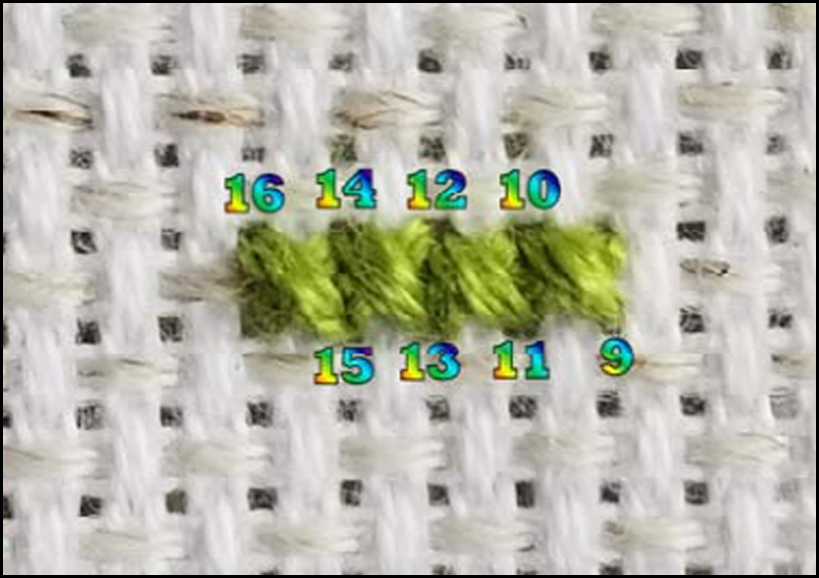
Start in the first hole (1), coming up from underneath the fabric. Then go back down into the top of the fabric with your needle in the diagonal top right (2). Then, come back up to the hole to the right of the first (3). You then continue to make half stitches across (4-8) until you’re ready to end your line. Then you will be doing the same thing back to form an X. Start by coming up from the bottom (9) and then moving diagonally up and to the left (10).
This working method (completing a row of half-stitches and returning back across) is the Danish Method. The Danish Method is said to be faster, more efficient, and leaves a cleaner back. Alternatively, you can complete each full “X” individually as you go (the English Method). The English Method is preferred if you’re using variegated or hand-dyed floss.
Advanced Stitches (If Applicable)
I try to avoid many advanced stitches (and backstitching) in my patterns unless it is really needed. If any advanced stitches are part of the pattern it will be included in the pattern description.
Backstitching
Done with a single strand of floss unless the pattern specifies otherwise. It creates fine outlines, lettering, and sharp details over completed cross stitches. Follow along with the pattern or use your own preferences as to where to start and end backstitching.
Fractional Stitches
A quarter stitch (1/4) comes up from an outer corner hole and goes down into the exact center of the fabric square’s weave. A three-quarter stitch (3/4) adds a full diagonal half stitch (a half stitch is a single diagonal line across a square instead of completing a full X) across the square over that quarter stitch. When a single chart square contains two different colored symbols split by a diagonal line, stitch a 3/4 stitch in the foreground/dominant color and a 1/4 stitch in the background color.
French Knots
Push your needle from the back of the fabric to the front right where you want the knot. Grab the working tail of the thread with your non-dominant hand. Point the needle tip down toward the fabric and wrap the thread around the needle 2 times (or 3 times for a larger knot). Put the needle back down into the fabric right next to the original hole. Do not go back into the exact same hole, or the knot will slip straight through. Keep holding the tail of the thread taut until the needle is almost all the way through to the back. Release the thread at the last second and pull the rest of the floss down to secure the knot on top of the fabric.
Washing & Finishing Care
Washing & Drying
Fill a clean basin with cool or lukewarm water. Hot water can set stains or cause threads to run. Add a tiny drop of mild dish soap (such as original Dawn) or specialized gentle wash and stir to combine. For tough stains or heavy dirt/grime, you can mix in a pinch of OxiClean. Test for colorfastness beforehand if you used hand-dyed floss or unfamiliar thread brands.
Submerge the cross stitch completely in the soapy water. Let it soak for 10 to 15 minutes. Swish the fabric gently with your hands. Never scrub aggressively or twist the cloth, as this can fray or distort the stitches.
Drain the soapy water and refill the basin (or hold under a gentle tap) with clean, cool water. Rinse the fabric carefully until the water runs completely clear and no soap bubbles remain. Leftover soap can attract dirt over time.
Do not wring or twist your piece to remove water. Lay the piece flat on a clean, white (or light-colored) dry towel. Roll the towel up with the cross stitch inside and press gently to absorb extra moisture.
Unroll and lay the damp piece face down on a clean towel. Iron carefully on the back side using a medium heat setting (with the steam off) to smooth out wrinkles and puff up the stitches.
Displaying
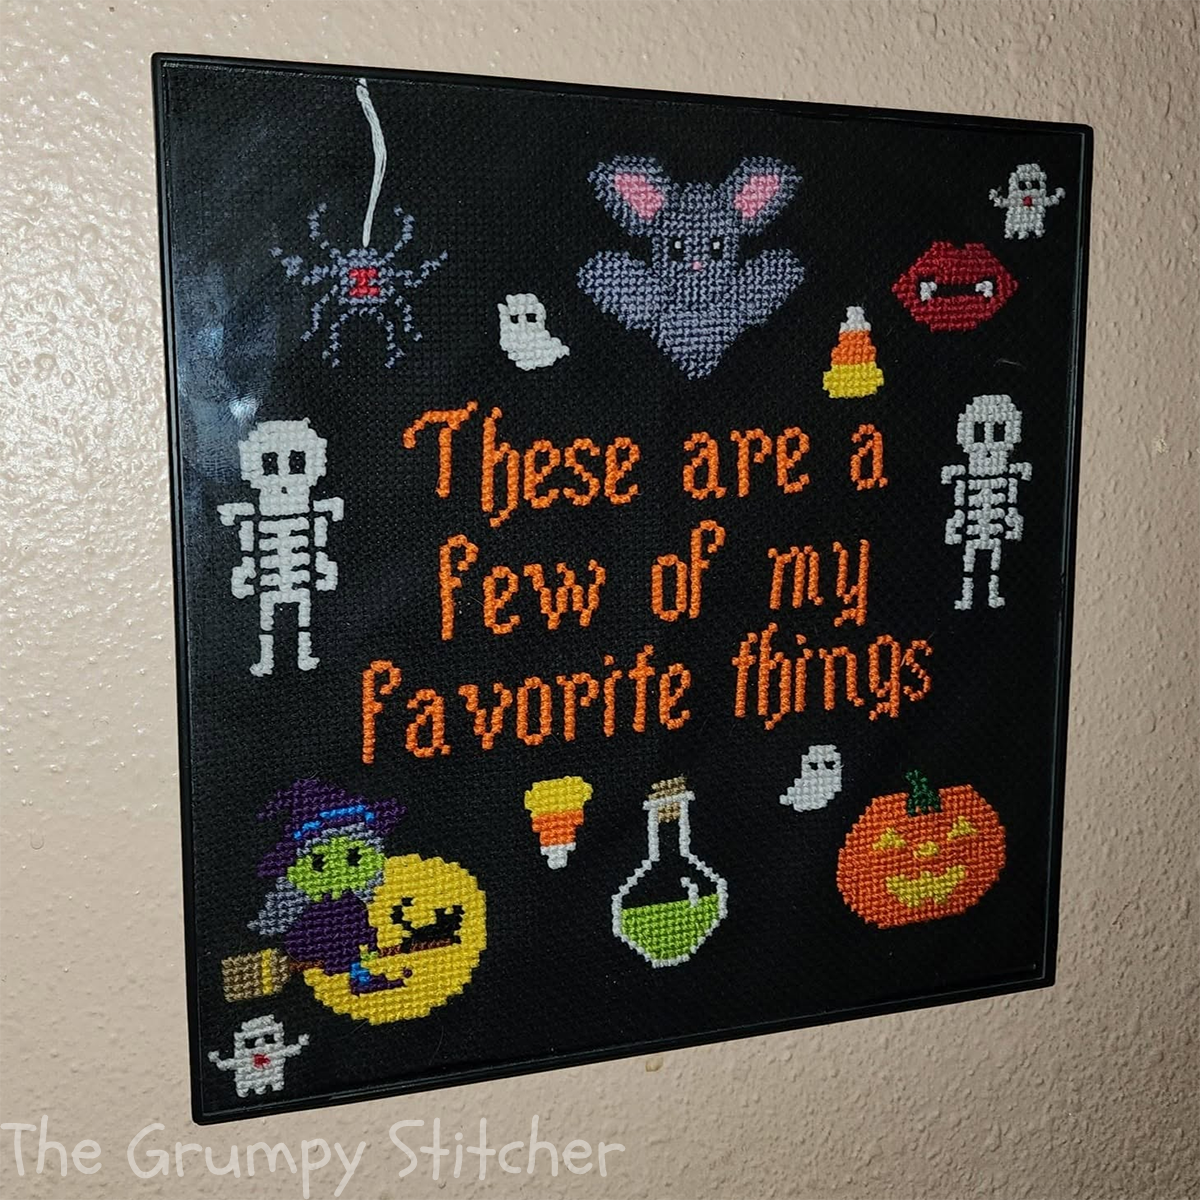
There are many options when it comes to displaying your finished piece. Some stitchers like to take their pieces to professionals to be framed. Others prefer to do it themselves at home. I will share two of the most common at home methods below. As always, experiment to find what works best for you.
Framing: Center the piece over acid-free foam board, heavy mat board, or stiff cardboard. Fold the margins over to the back and either lace the opposing edges together with strong sewing thread or secure with acid-free framer’s tape (standard masking tape and sticky mounting boards can degrade and discolor fabric over time).
Hoops: Keep the finished work clamped tightly inside an embroidery hoop. Trim the excess margin to about an inch, sew a loose running stitch along the outer edge, and pull it taut like a drawstring to gather the fabric neatly behind the hoop. Some stitchers like to add a felt or fabric circle on the back to hide the stitching. Alternatively, you can purchase ready-made hoop frames.